Author: Screen
A screen is the template shown for each trial of a phase. You build it once, and PsyCloud fills it with each trial's data at run time. Open it from a trial phase's Screen tab (inside Author), or via Open Screen in the Inspector.
Three ways to edit a screen
The screen has three sub-views over the same content:
- Timeline — what happens first, next, and for how long. Edit durations and end rules.
- Canvas — where the participant sees things. Lay out and style components visually.
- Bindings — how trial data feeds the screen. See and edit every data connection at a glance.
A device selector (Desktop / Laptop / Tablet / Mobile) and a Preview row picker let you check the layout at different sizes and against different trials.
Steps
A screen plays as an ordered sequence of steps. The Stroop Trial screen has two:
| Step | Duration | Ends when |
|---|---|---|
| fixation | 500 ms | Time elapses |
| Stimulus + Response | up to 2000 ms | The participant responds (or it times out) |
The Inspector summarizes the sequence (here: 4 nodes, 2500 ms total). Use Add step to insert fixation, stimulus, response, or feedback steps.
Components
Each step contains components — the text, images, shapes, and response collectors a participant sees and interacts with. Select a component (on the Canvas or in the step) and the Inspector shows its properties, grouped into:
- Content / Source — what the participant sees, and where it comes from.
- Appearance — font, color, opacity, and so on.
- Position & Layout — placement (e.g. centered at 50% / 50%) and size.
Bindings: connecting trials to the screen
A binding is what makes one screen serve many trials. Instead of typing fixed text, you point a property at a trial column.
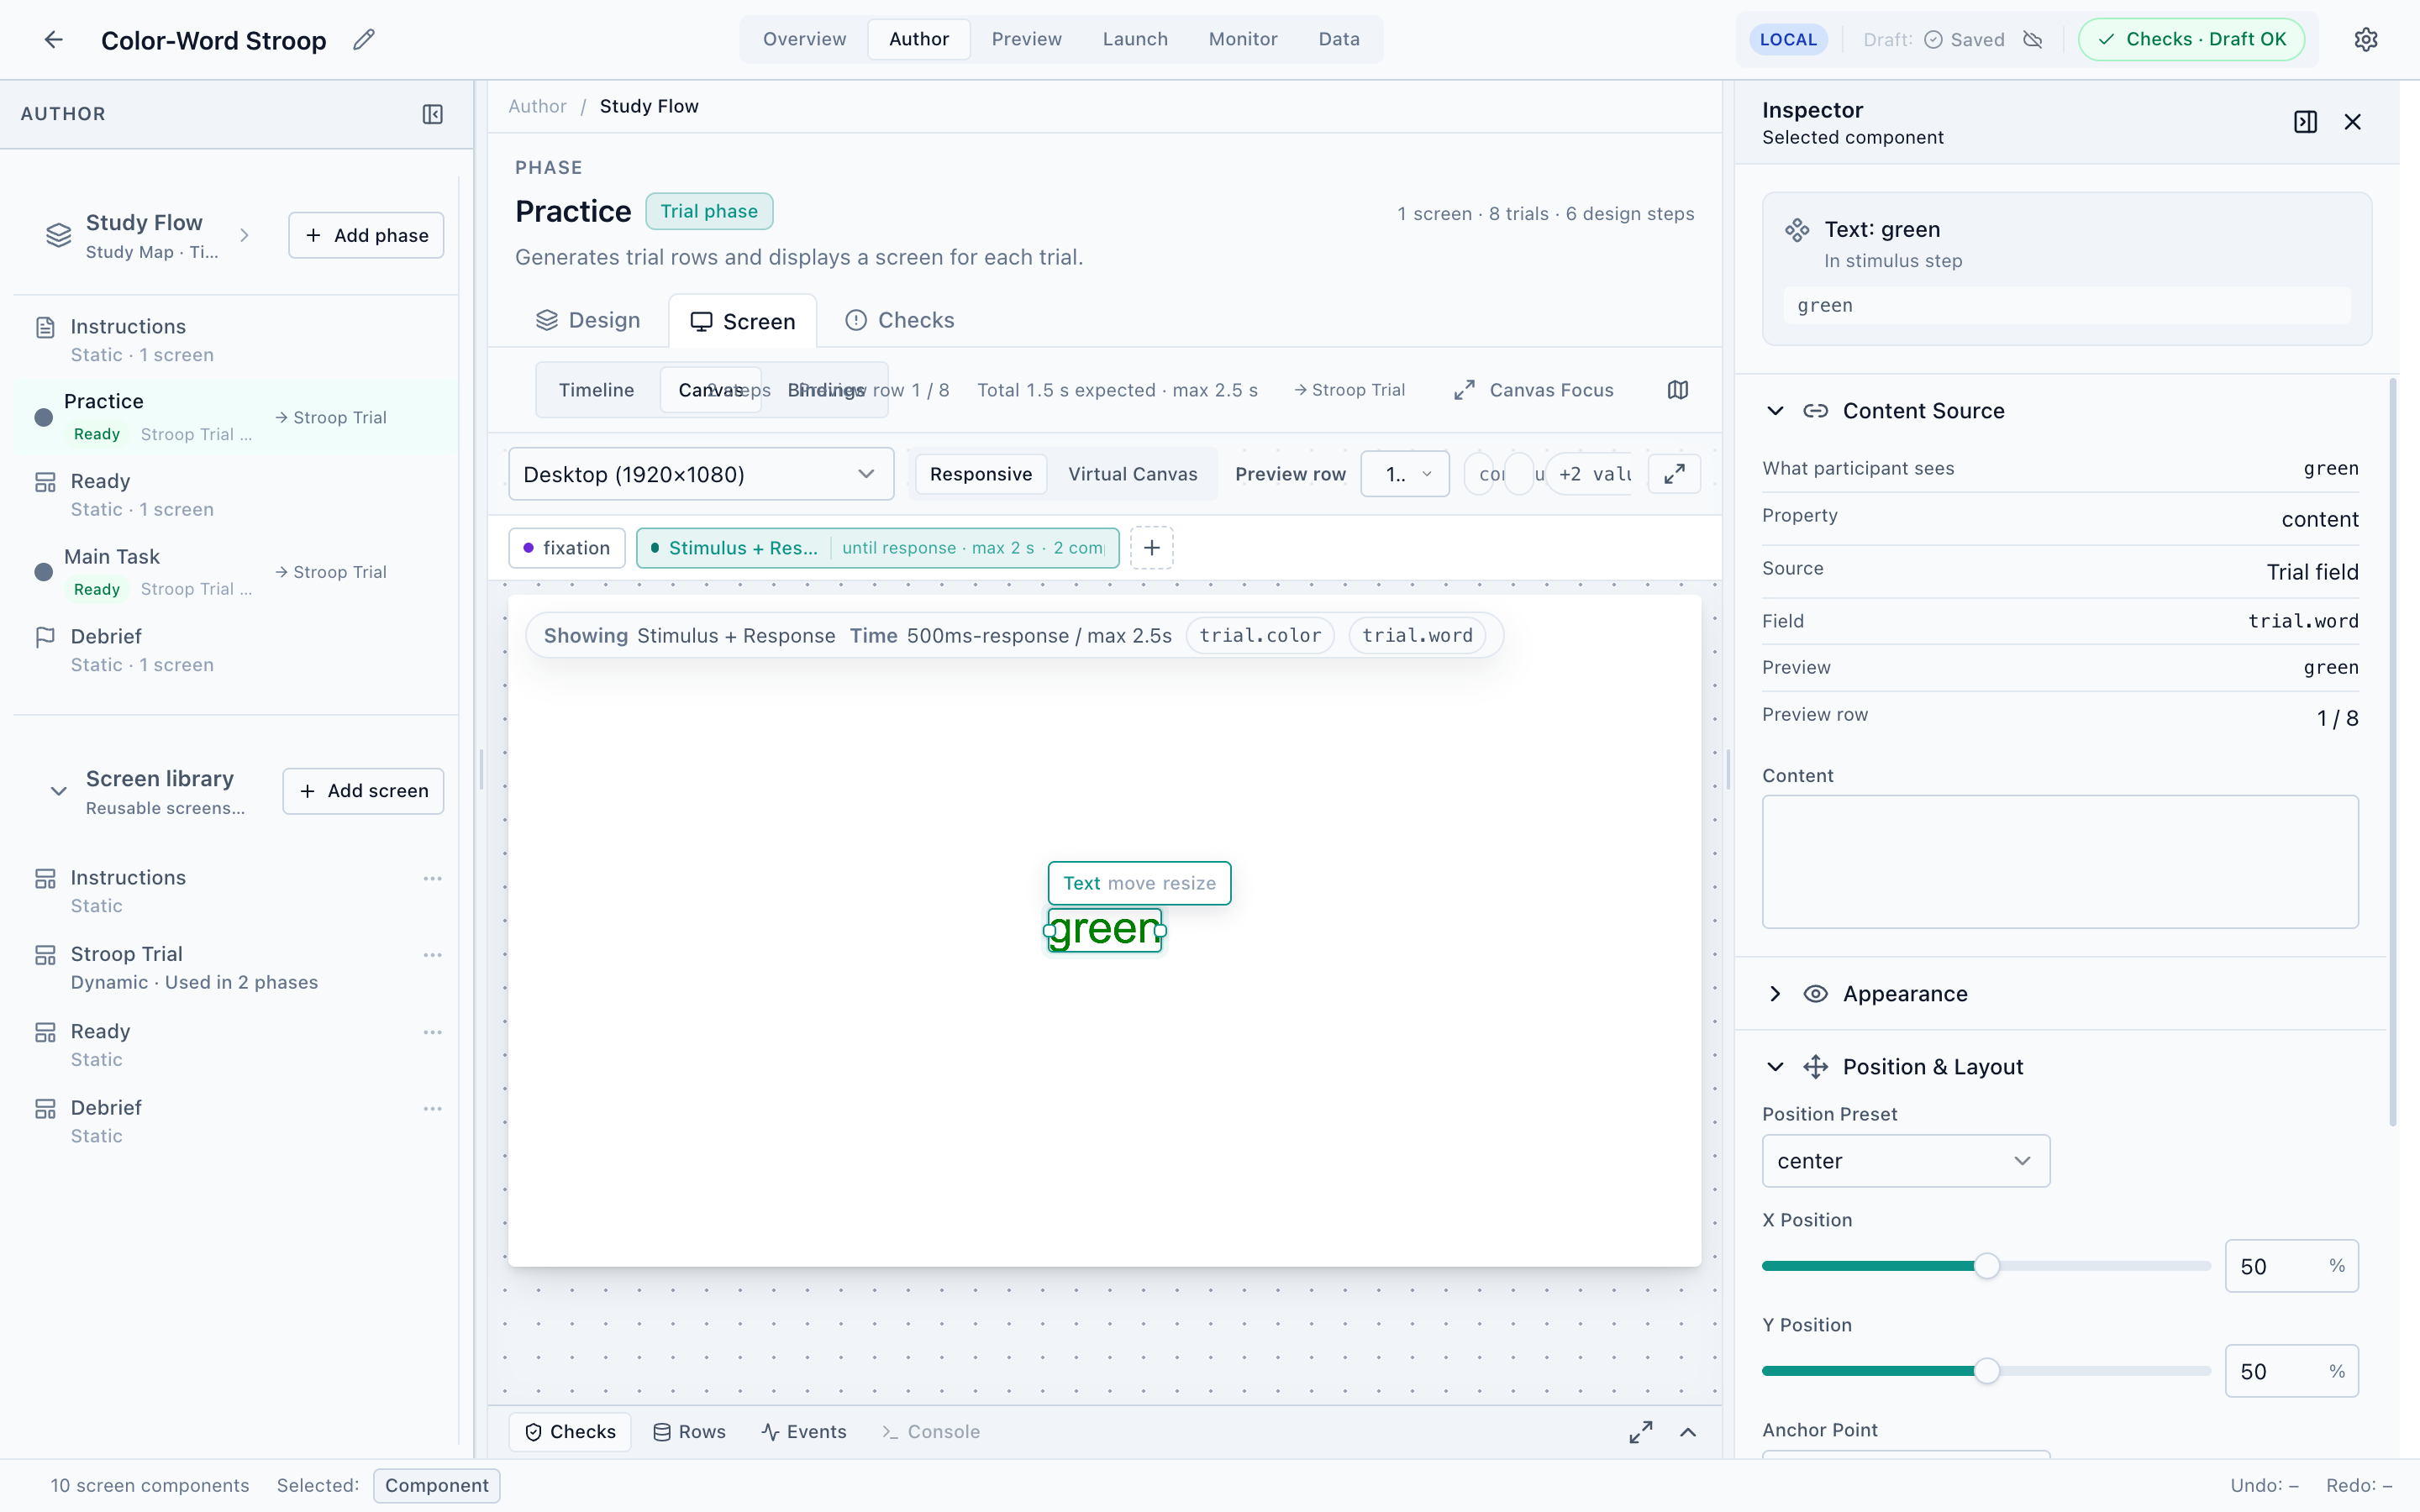
In the screenshot the selected Text component’s Content Source is set to:
- Source: Trial field
- Field:
trial.word - Preview:
green(because Preview row 1 hasword = green)
So the component renders whatever each trial's word value is — green, red, and so on — and
the ink color comes from another binding to trial.color. The columns you can bind are exactly
those produced in Trial Design.
- Select a component
Click it on the Canvas (or in the step) to load its properties in the Inspector.
- Set the source to a trial field
In Content / Source, choose Trial field and pick the column (e.g.
trial.word). - Verify with the preview row
Change the Preview row to confirm the binding resolves correctly across trials.
The Stroop Trial screen is reused by both Practice and Main Task. Editing it here updates both phases — the Inspector shows its Phase membership so you always know what you're affecting.
Next
Run the whole study against the real runtime and watch it execute.