Studio
Studio is PsyCloud's visual workspace for building and running experiments in the browser — no code required. You design the structure of a study, compose what participants see, debug it against a live runtime, publish it, recruit participants, and export the data, all from one app.
This chapter documents Studio as it actually behaves. Every screenshot is captured from the real application using the Color-Word Stroop example study, which you can create in under a minute (see Creating a Study).
Studio runs entirely in your browser and saves your work locally as a draft until you publish. You can follow this chapter hands-on without setting up any backend.
The six perspectives
Every study moves through the same lifecycle. Studio exposes that lifecycle as six perspectives — the tabs along the top of the study workspace:
The perspectives are ordered left-to-right roughly in the order you use them, but you can jump between them at any time — switching perspectives never loses your place.
Earlier versions of Studio split authoring into separate “Design” and “Build” steps. Today both live inside the Author perspective: you shape the study structure in Study Flow, generate trials in Trial Design, and compose the participant view in Screen.
Anatomy of the workspace
Once you open a study, Studio uses a consistent five-region layout. The regions change their contents per perspective, but their positions stay put — so the app always feels the same.
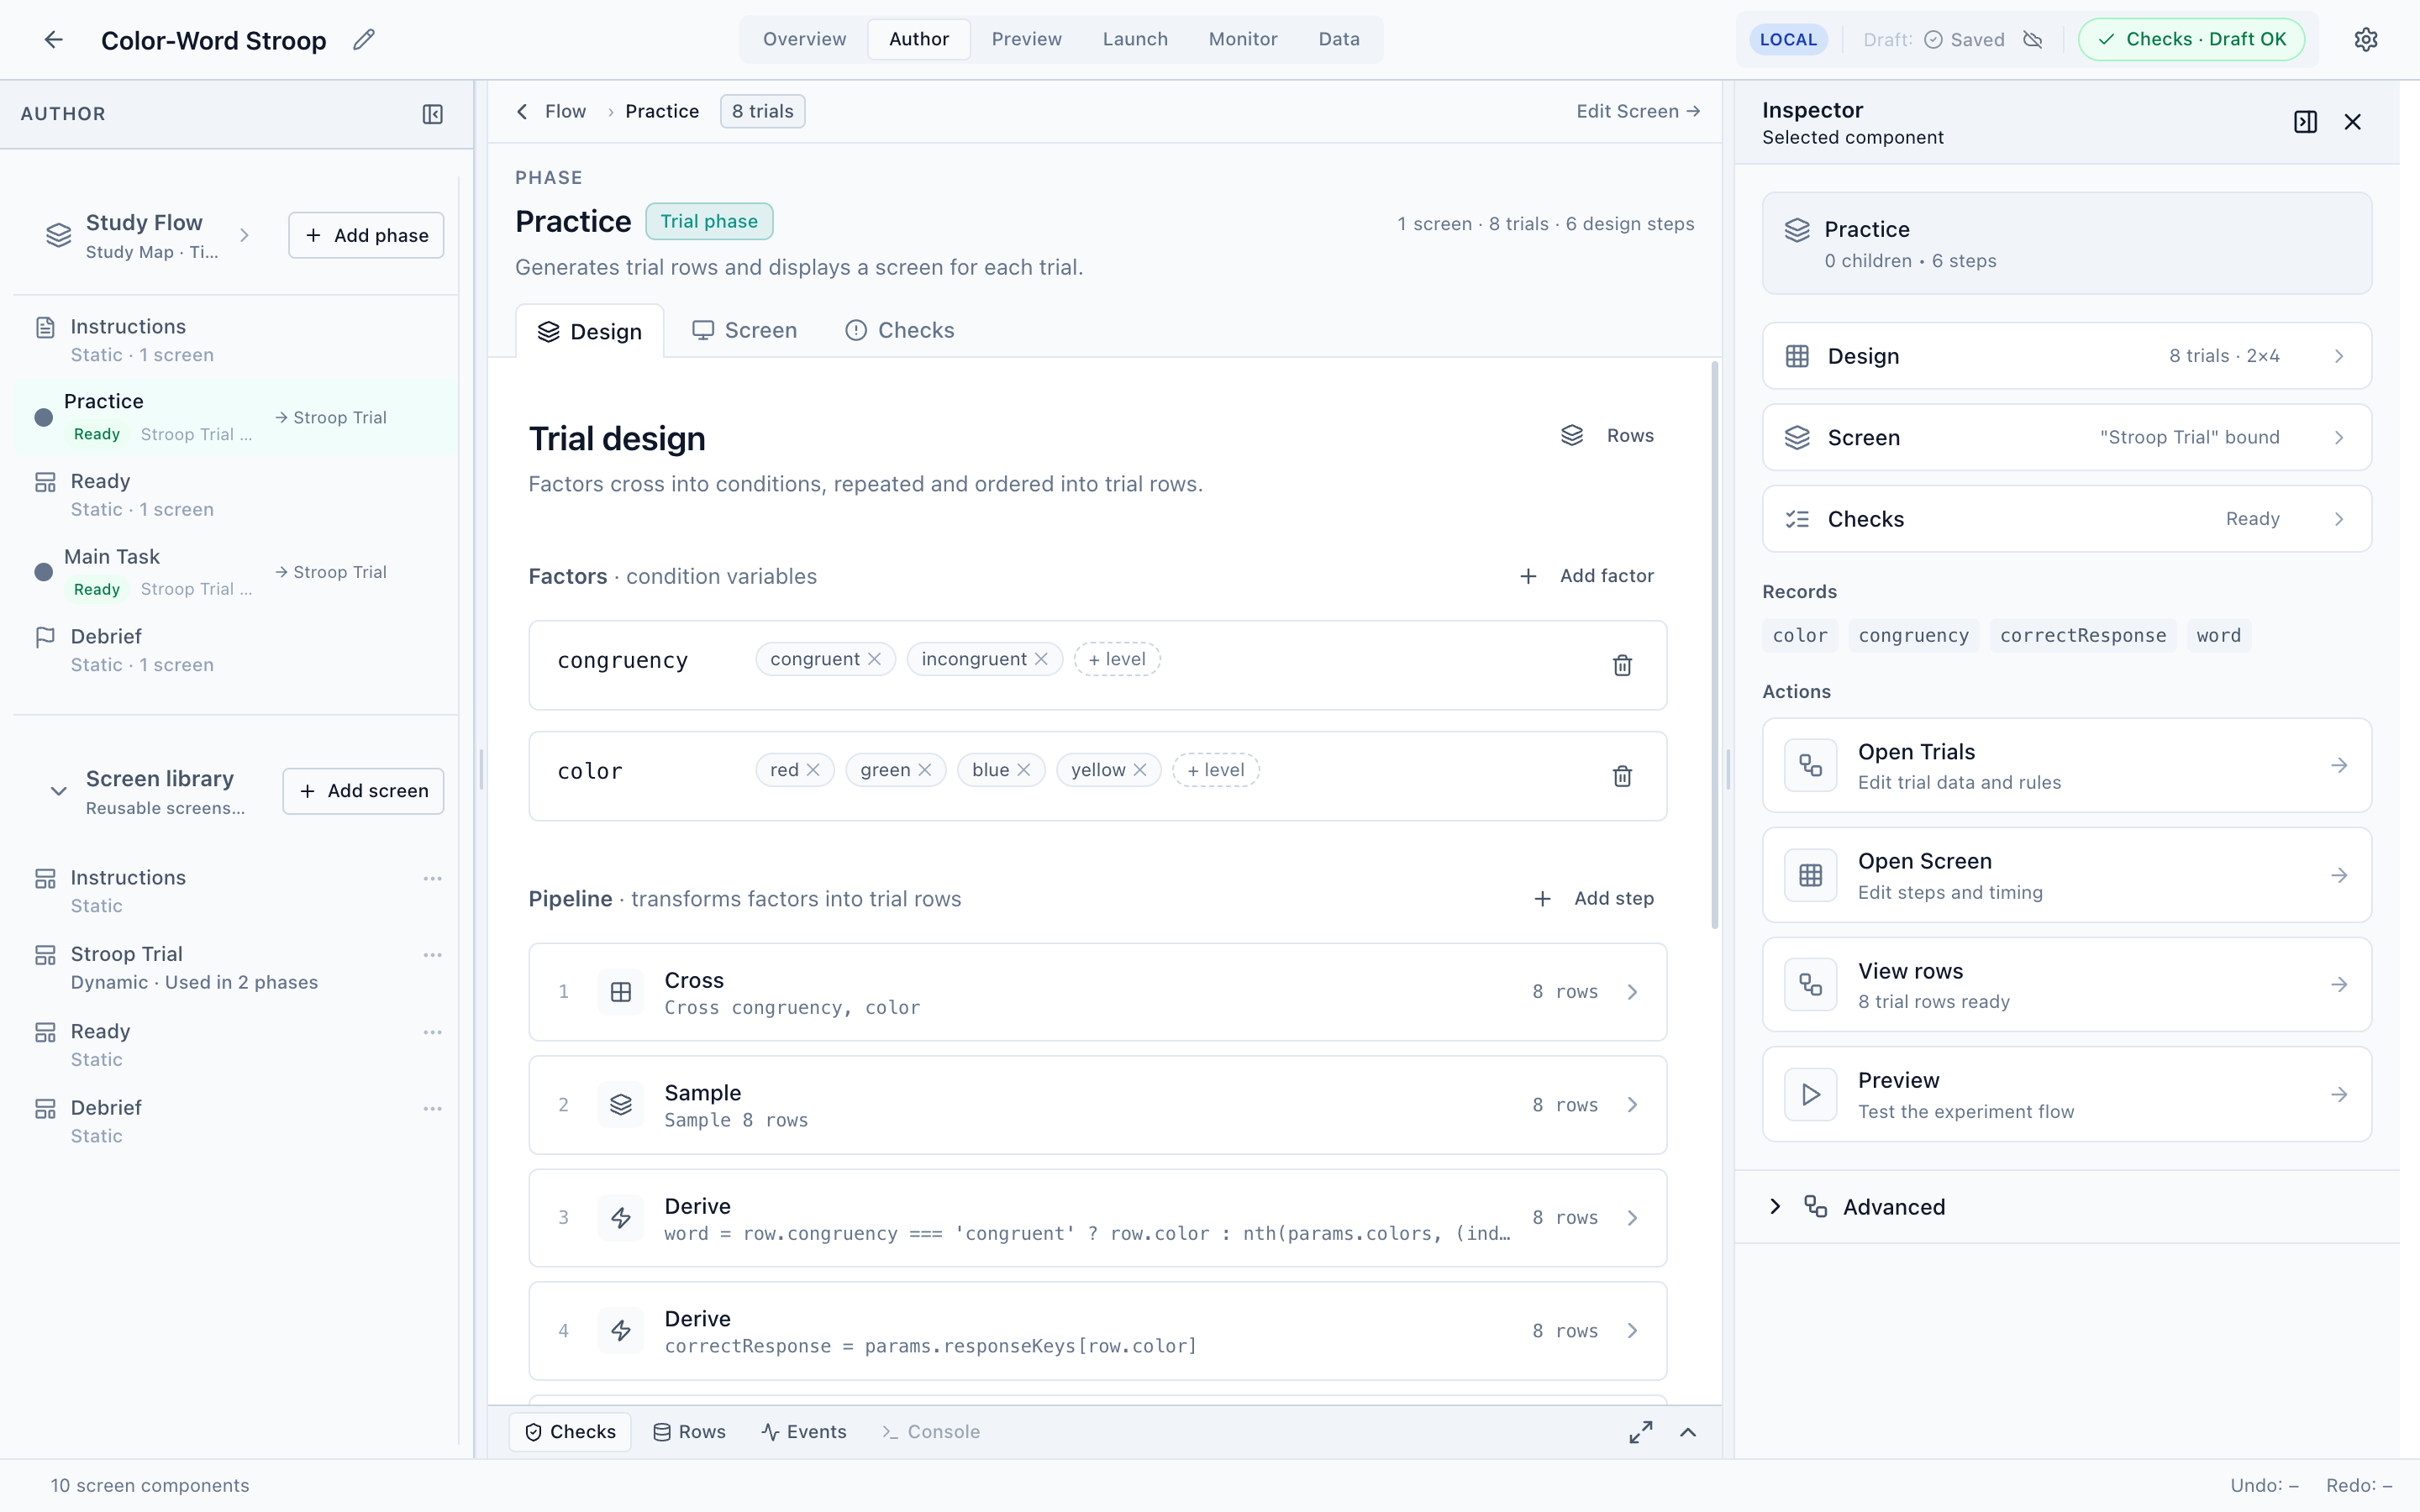
- Header (top)
The study name, the six perspective tabs, a connection badge (LOCAL while you work offline), the Draft save indicator, and the Checks chip — a live summary of whether the study is valid. Click Checks to jump to the issues.
- Navigator (left)
Perspective-scoped navigation. In Author it shows your Study Flow, the list of phases, and the shared Screen library; in Preview it shows scenarios and sessions; in Launch it shows the readiness checklist; and so on. Collapse it with ⌘B.
- Workbench (center)
The main editing surface for the current perspective.
- Dock (bottom)
Tabbed instrumentation that follows you everywhere: Checks, Rows (the generated trial table), Events (the runtime telemetry stream), and Console.
- Inspector (right)
Context-aware details and quick actions for whatever you have selected. Collapse it with ⌘\.
Local-first by design
Studio is offline-first. As you work, changes are saved to a local draft — the header shows Draft: Saved with no servers involved. The green Checks · Draft OK chip confirms the draft has no blocking issues.
Publishing a versioned release, hosting a run, recruiting participants, and exporting collected data require a connection to the PsyCloud backend. Until then, those steps appear but stay locked, and Preview/Monitor work against local sessions only. Each perspective explains exactly where that line sits.
Everything in Author and Preview works fully offline. Launch (publish, hosted runs, recruitment) and Data export require the hosted backend. See Launch for the details.